
How to install Let’s Encrypt SSL in Plesk Server?
Step1. Login to the Plesk server with the admin account. Go to SSL/TLS Certificates under “Websites & Domains”.
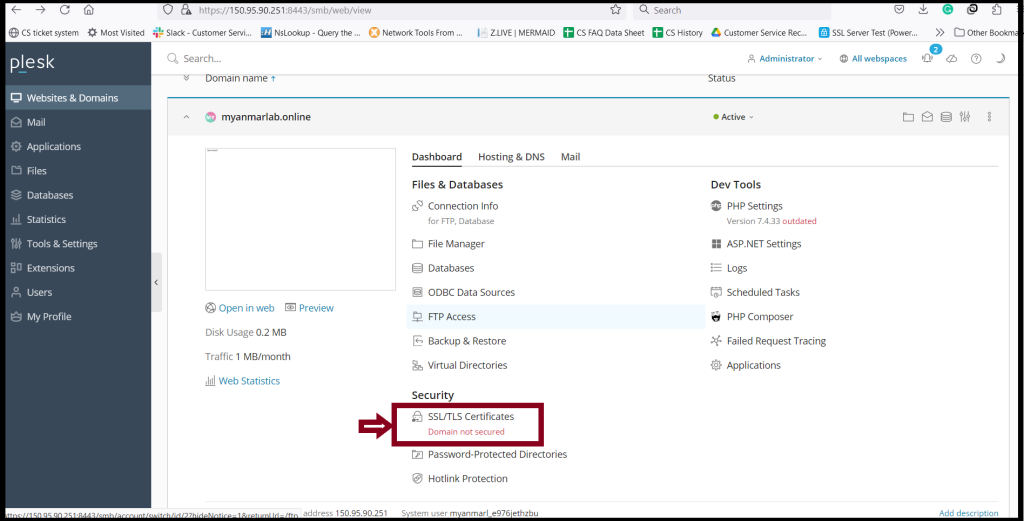
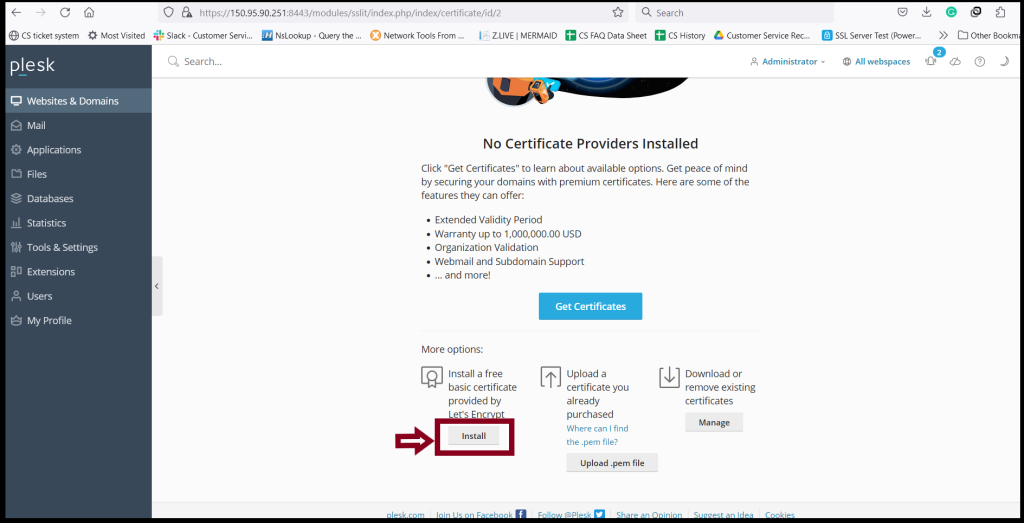
Step2. Click “Install” in the following image.
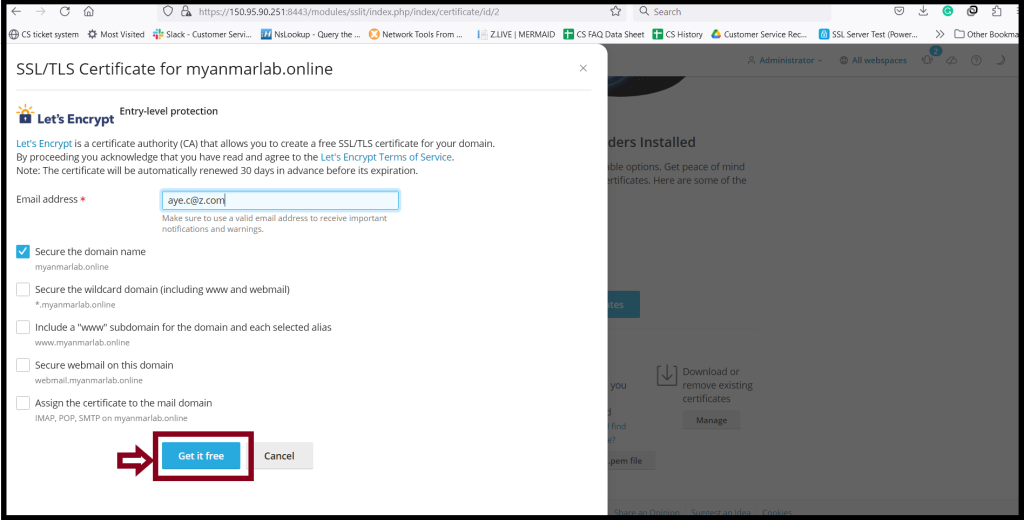
Step3. Checkmark the common name that you want to install Let’s Encrypt and Click “Get it free“
Step4. After waiting for a moment, the Let’s Encrypt SSL was activated.
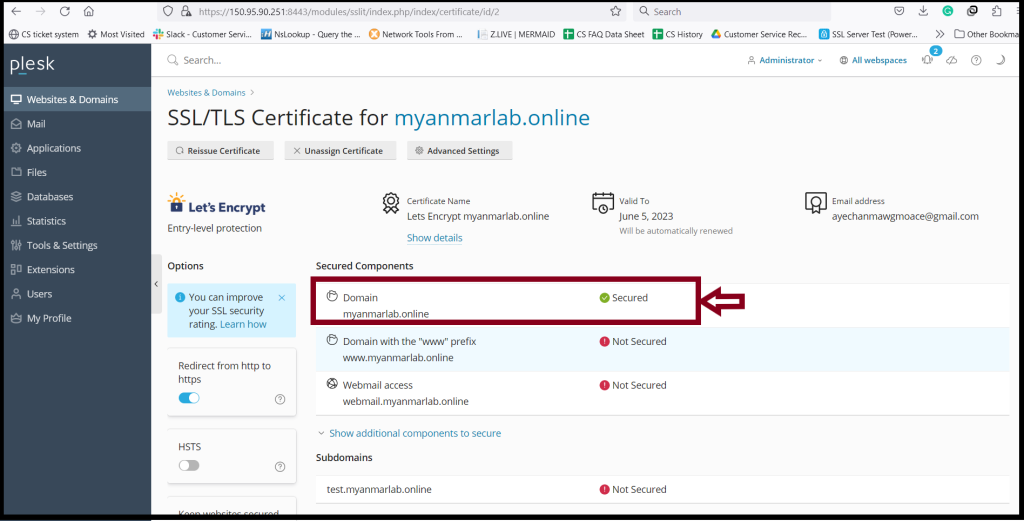
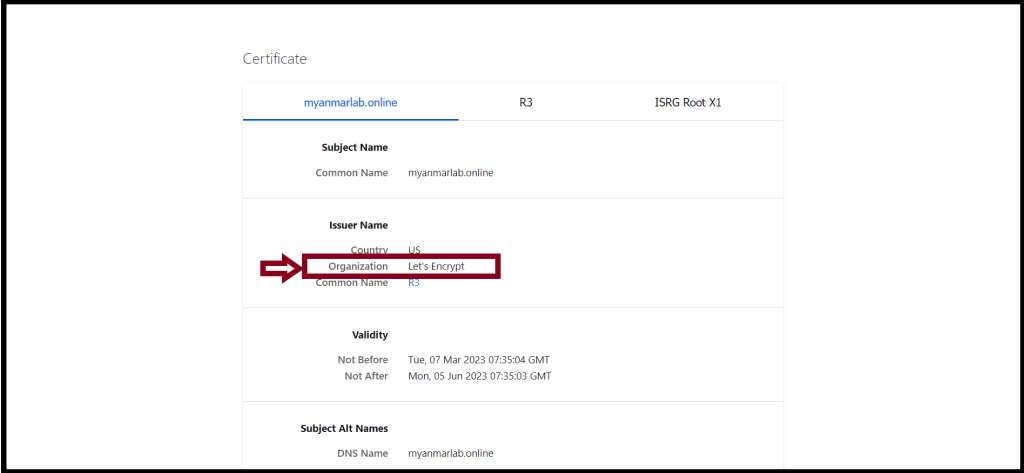
Step5. You can check your website certificate also.
Thank you!!!