
How to Upgrade Email Hosting Plan?
Step1. Login to the Z.com account, https://cloud.z.com/mm/signin/
Step2. Click the “Email Hosting” Menu
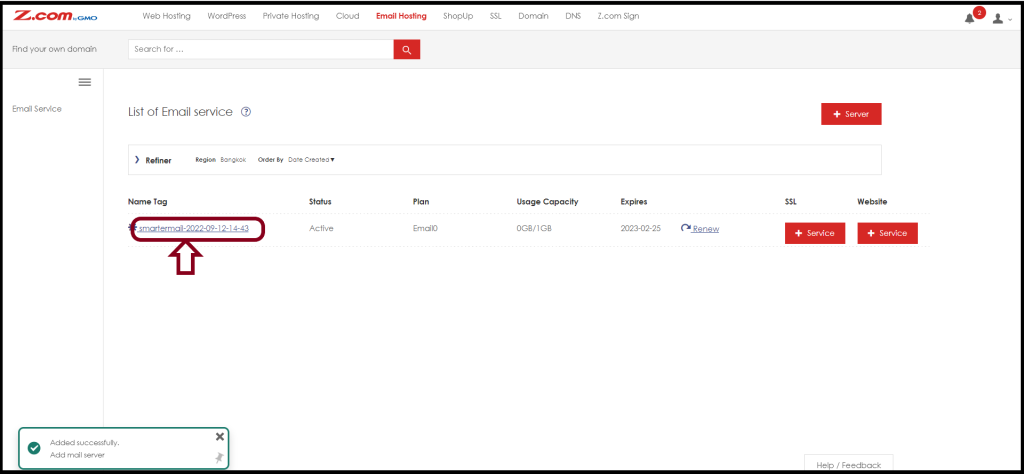
Step3. Select your Email Hosting server Under Email Hosting Server List
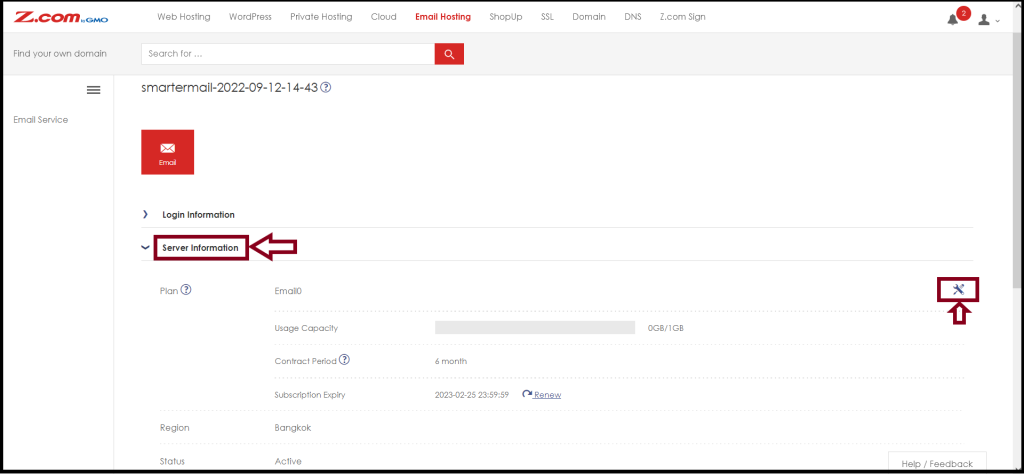
Step4. Go to the “Server Information” to change the Email Hosting plan
And then, Click the “Change” button
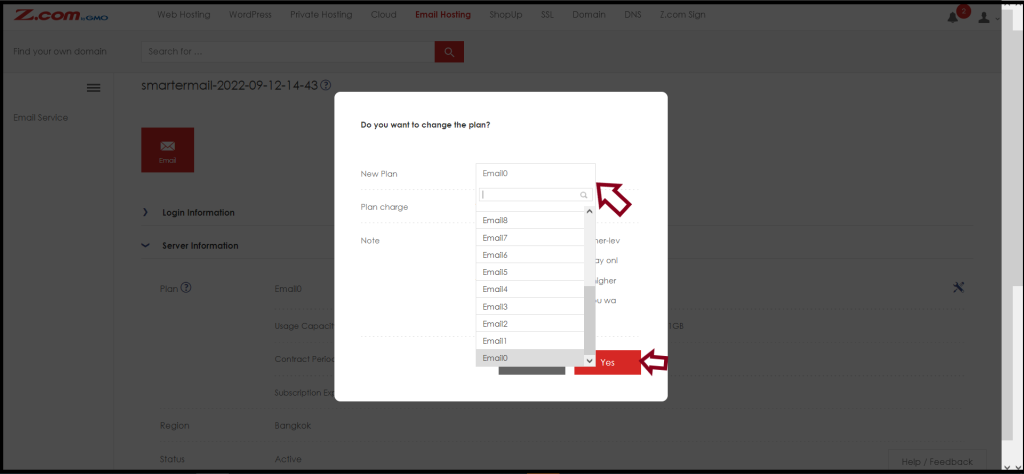
Now you can choose the upgraded plan that you want to use as follows.
And Click “ Yes”
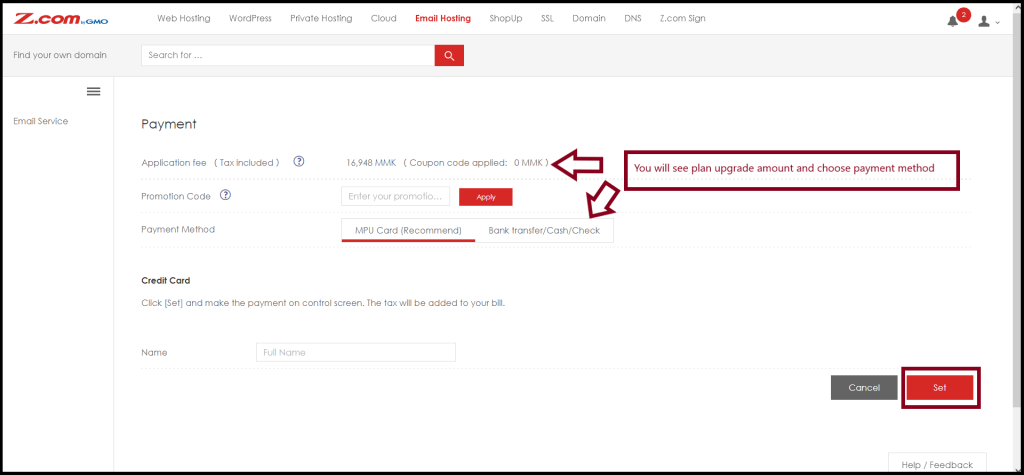
You can choose the payment method before you changed the plan and Click “Set“
After these steps are completed and waiting a few minutes, the Email Hosting plan upgrading process is completed.
Thank you!!!