
How to set up Email Accounts in Microsoft Outlook[Myanmar Version]
အဆင့် (၁) – Z.com Account ကို မိမိဖွင့်ထားသော Username, Password နှင့်အတူ အောက်ပါ Link မှ၀င်ရောက်လိုက်ပါ။
https://cloud.z.com/mm/signin/
ပြီးလျှင် အပေါ် Menu မှ Email Hosting ကို နှိပ်လိုက်ပါ။
Email Hosting Menu အောက်သို့ရောက်လျှင် Name tag ၏ အောက်တွင် ရှိသော မိမိ Server ၏ နာမည် link ကို နှိပ်ပါ။
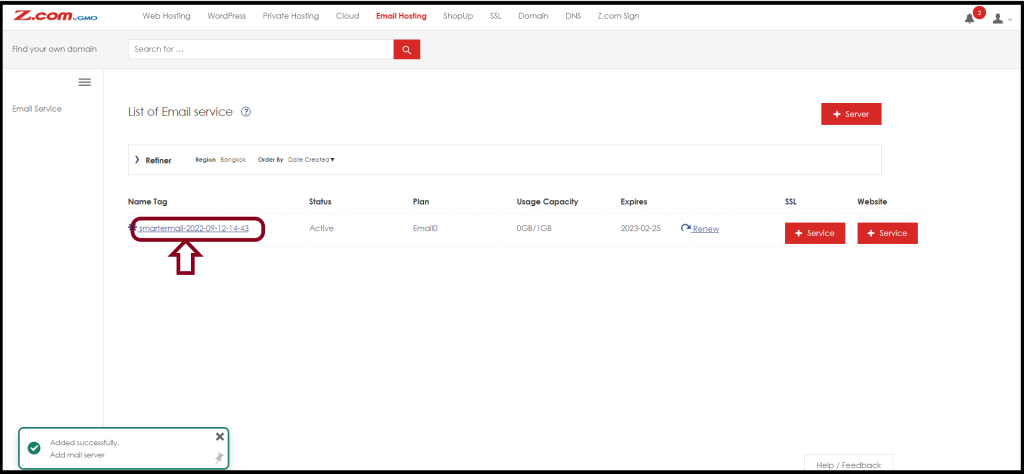
ပြီးလျှင် outlook setting တွင် ထည့်သွင်းအသုံးပြုရန် Incoming / outgoing server အချက်အလတ်အားမှတ်သားထားပေးပါ။
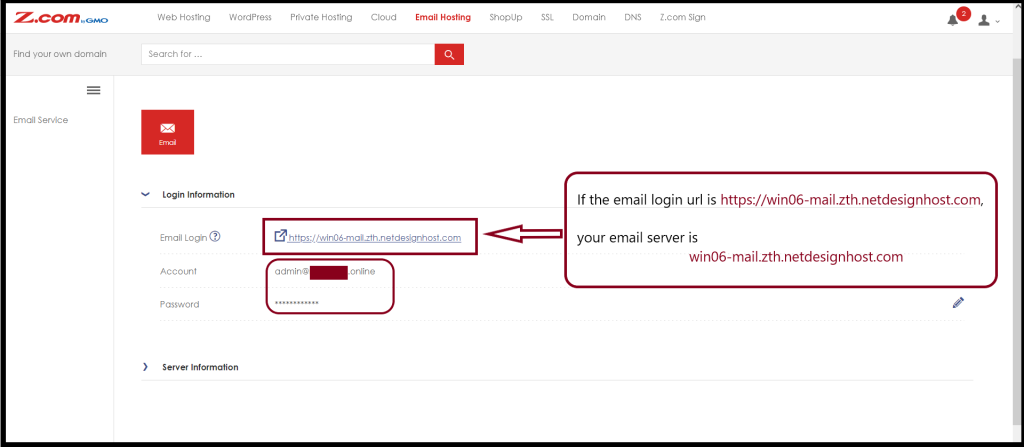
https:// မပါပဲ ကူးယူလိုက်ပါ။
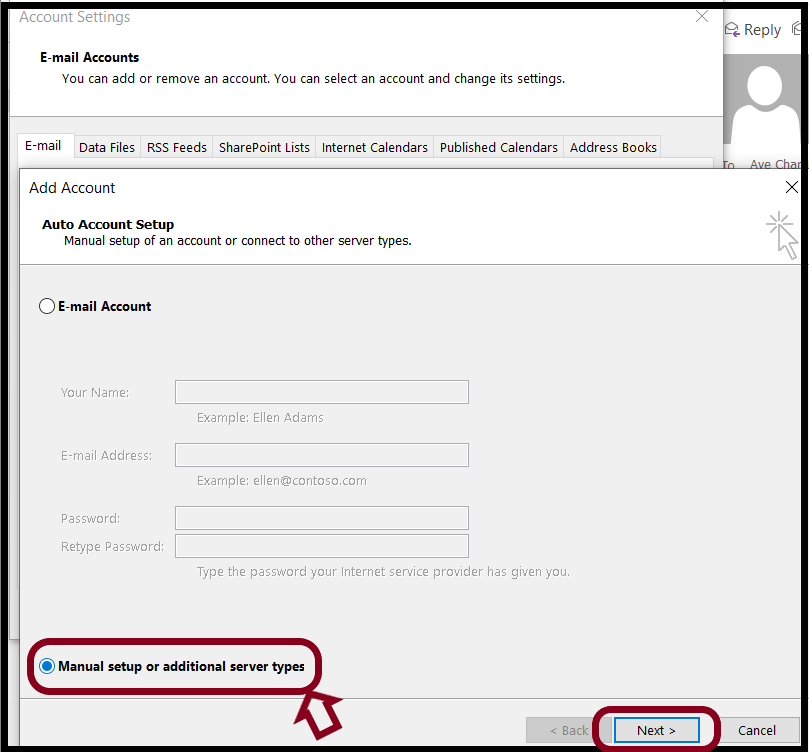
အဆင့် (၂) – Microsofl Outlook ကိုဖွင့်ပြီး Account Settings ကိုရွေးချယ်ပါ
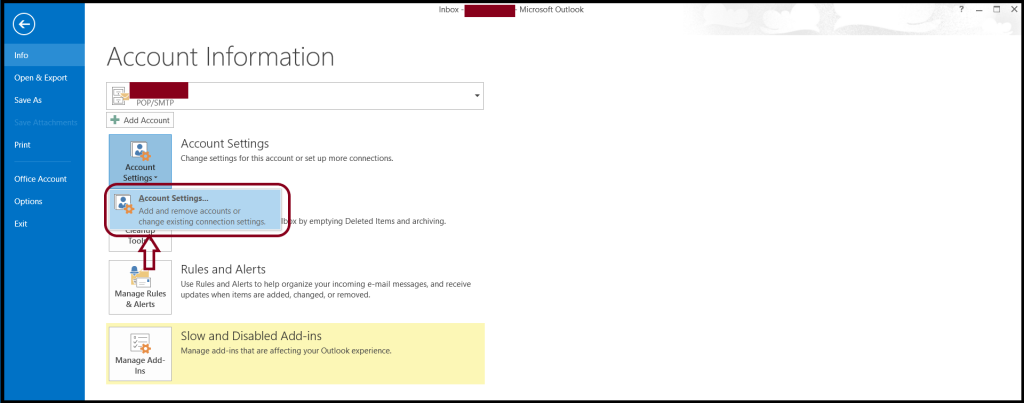
Account Settings ထဲသို့ရောက်လျှင် Email Menu အောက်မှ New ကိုရွေးချယ်ပေးပါ
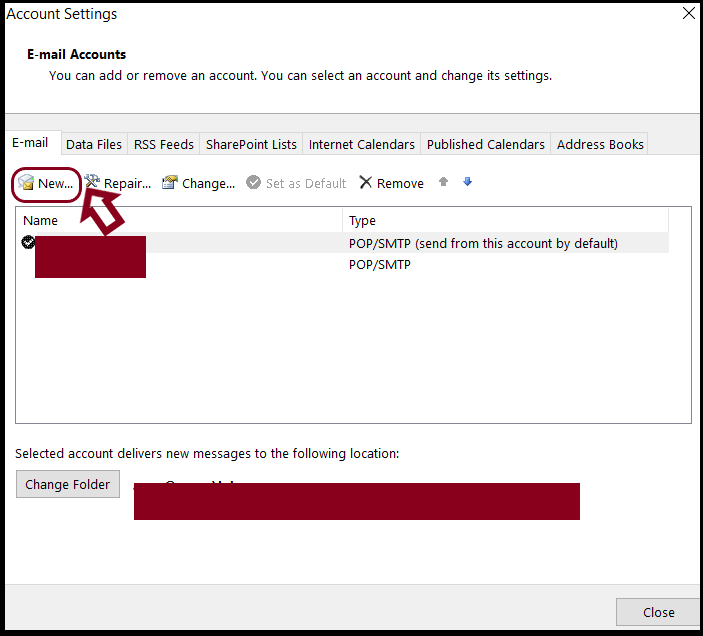
New Box ကျလာလျှင် Manual setup or additional server types ကို ရွေးချယ်ပြီး Next ကိုနှိပ်ပေးပါ
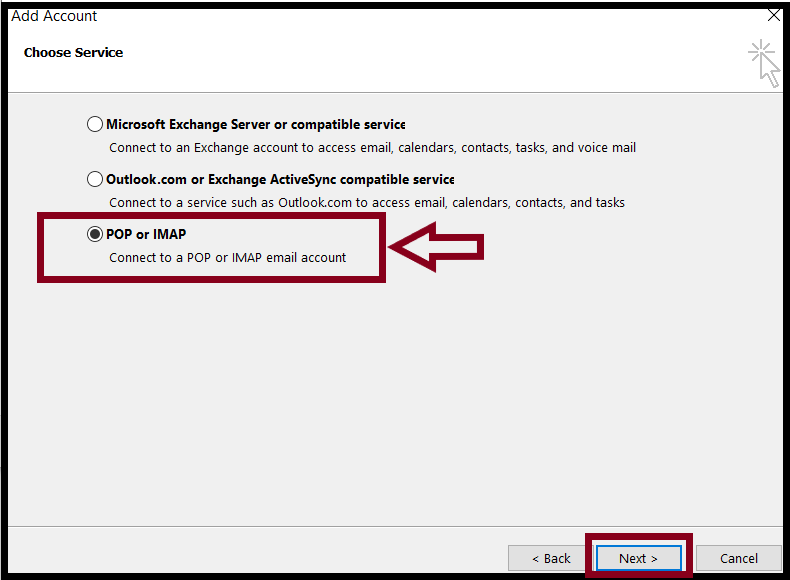
အဆင့် (၃) – ပြီးလျှင် Choose Service အောက်မှ POP or IMAP ကိုရွေးချယ်ပြီး Next ကိုထက်နှိပ်ပေးပါ
နောက်ထက် Box တစ်ခုကျလာလျှင် သင့်ရဲ့ နာမည် သင်သုံးမဲ့ Email address ကို User Information အောက်မှာဖြည့်ပေးပါ။
ပြီးလျှင် Server Information နေရာတွင် Account Type ကို IMAP ရွေးပြီး သင် copy ကူးထားသော သင့်ရဲ့ Email Server ကို https:// မပါပဲ Incoming Server , Outgoing server နေရာမှာကူးထည့်ပေးလိုက်ပါ

Logon information နေရာတွင်လည်း သင့်ရဲ့ Email address နှင့် password ကိုထက်မံဖြည့်သွင်းပေးပြီး remember password ကို အမှန်ခြစ်ပေးပါ။
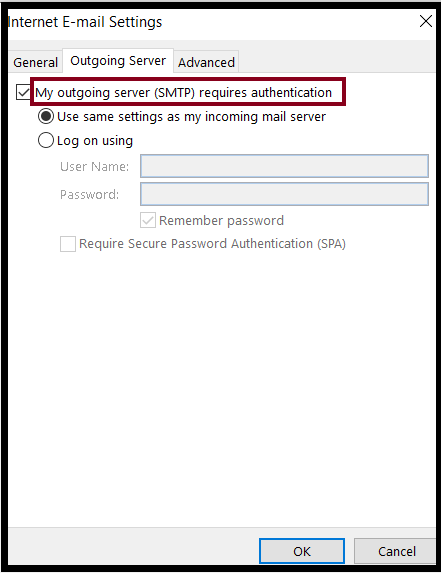
အဆင့် (၄) – ပြီးလျှင် More settings ကိုနှိပ်ပြီး Internet Email Settings အောက်တွင်ရှိသော Outgoing server အောက်မှ My Outgoing server (SMTP) require authentication ကို အမှန်ခြစ်ပြီး Use same settings as my incoming server ကိုထပ်မံရွေးချယ်ပေးပါ။
ပြီးလျှင် Outgoing server ဘေးမှ Advanced ကိုထက်မံရွေး ပြီး Incoming Server နေရာတွင် အောက်တွင်ဖော်ပြထားသော Ports များထဲမှ Incoming Server (IMAP) : 143 port number ကိုထည့်သွင်းပြီး Outgoing server (SMTP) 25 or 587 ထဲမှတစ်ခုကိုထည့်သွင်းပေးပါ
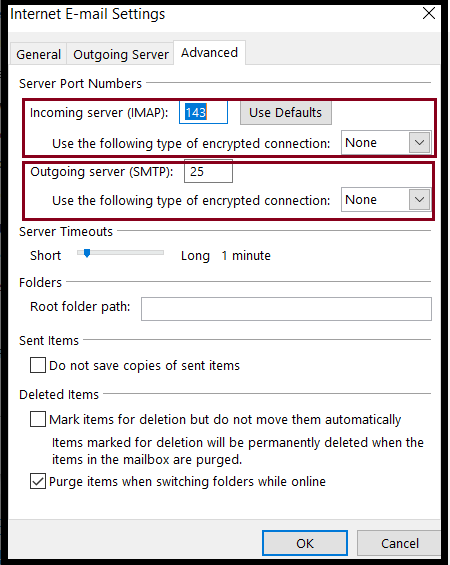
မှတ်ချက်။ ။ သင်အသုံးပြုသော outlook version ပေါ်မူတည်၍ Non SSL ports နှင့် အလုပ်မလုပ်ပါက SSL ports အောက်မှ (IMAP) 993 နှင့် (SMTP) 465 များကို ပြောင်းလဲထည့်သွင်းပေးပါ။
For SSL Ports ,
[Incoming Server(IMAP): 993  ,Incoming Server(POP) : 995, Outgoing Server(SMTP): 465]

For Non SSL Ports ,
[Incoming Server(IMAP): 143, Incoming Server(POP) : 110, Outgoing Server(SMTP): 25 or 587]
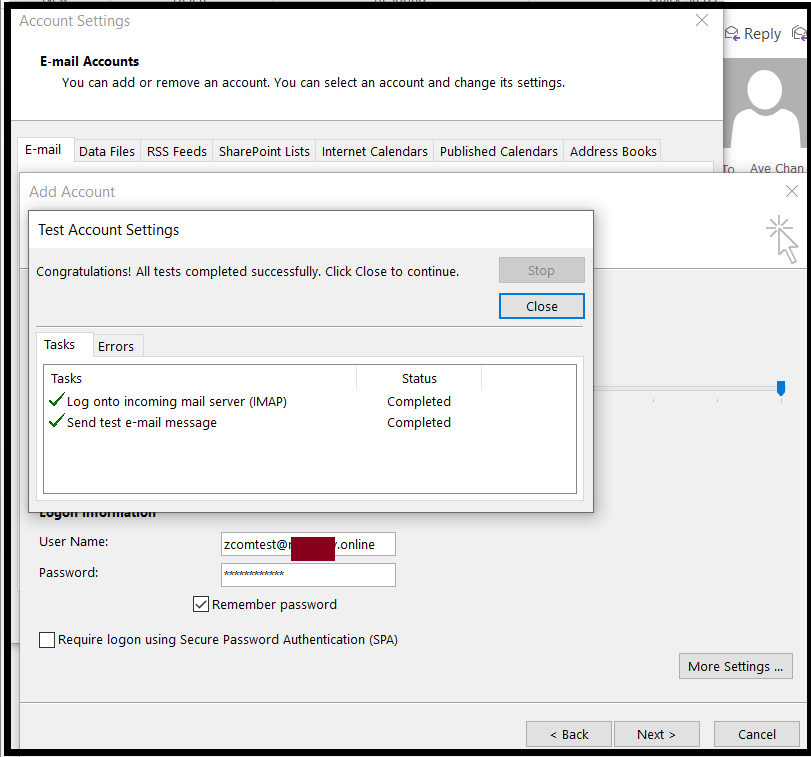
အားလုံးပြီးပါက OK ကိုနှိပ်ပေးပြီးဖွင့်ထားသော Box များကိုပိတ်ကာ Outlook တွင် Email စတင် သုံးနိုင်ပြီပဲဖြစ်ပါတယ်။