
How to Install SSL in Windows Server 2019?
Step1. Login to the Windows Server with RDP.
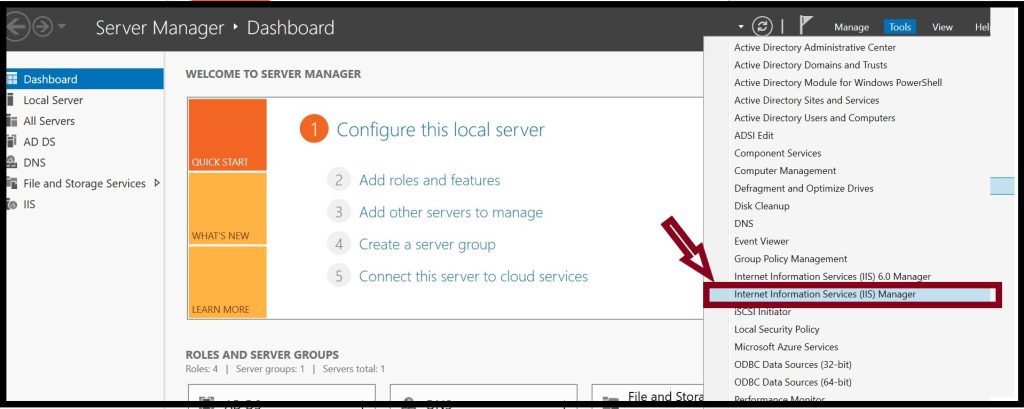
Step2. Go to Start >> Server Manager >> Tools >> Internet Information Service (IIS) Manager.
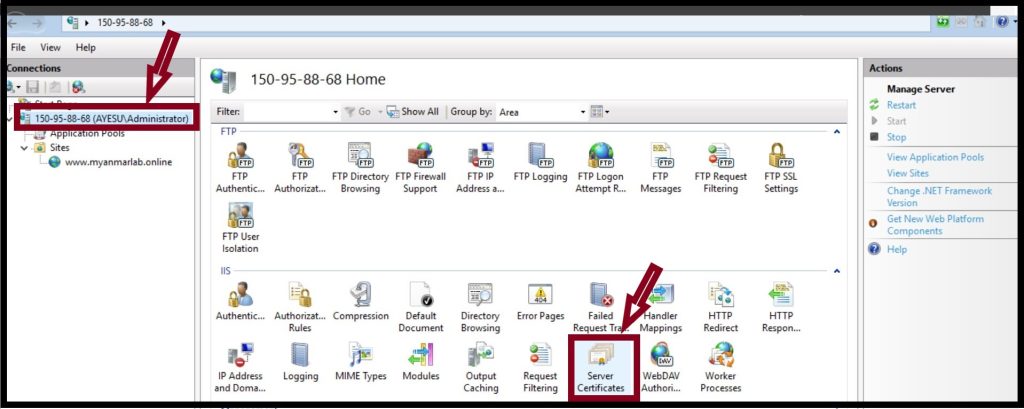
Step3. On the left side of the panel, Click on the Server name and then click Server Certificates.
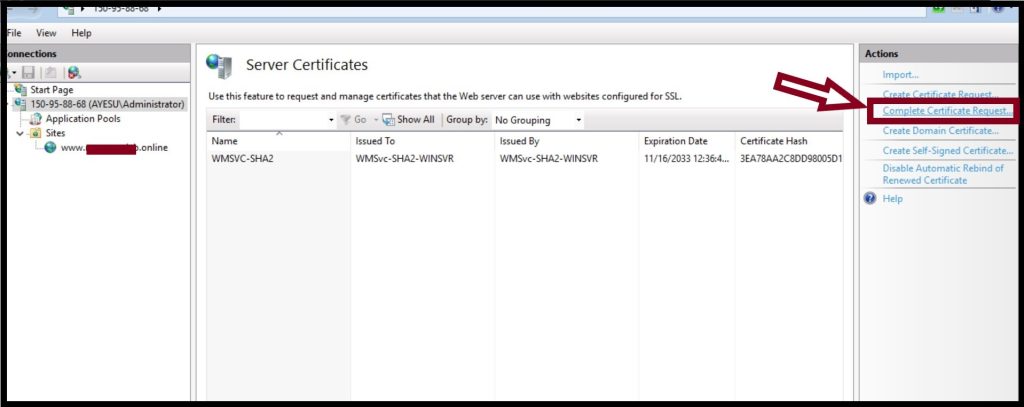
Step4. On the right side of the panel, Click on the Complete Certificate Request.
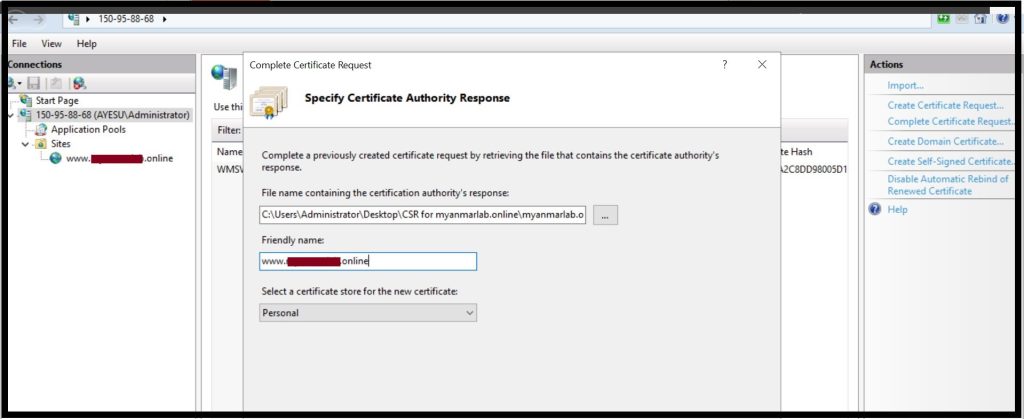
Step5. Browse the certificate file (.cer), add your domain name and Click OK. Now you have finished the SSL installation.
Step6. You need to assign the certificate to your website.
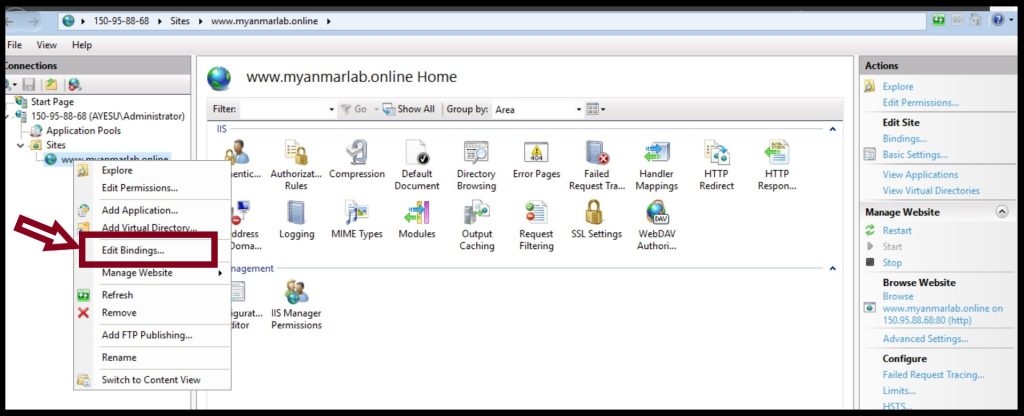
Step7. Open the IIS Manager, expand the server name and right click on the website name and Click Edit Bindings.
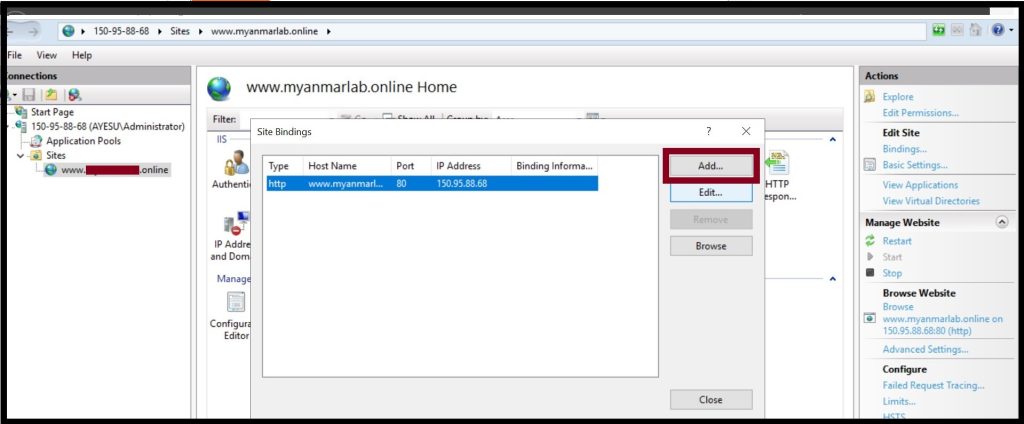
Step8. Click on the Add button.
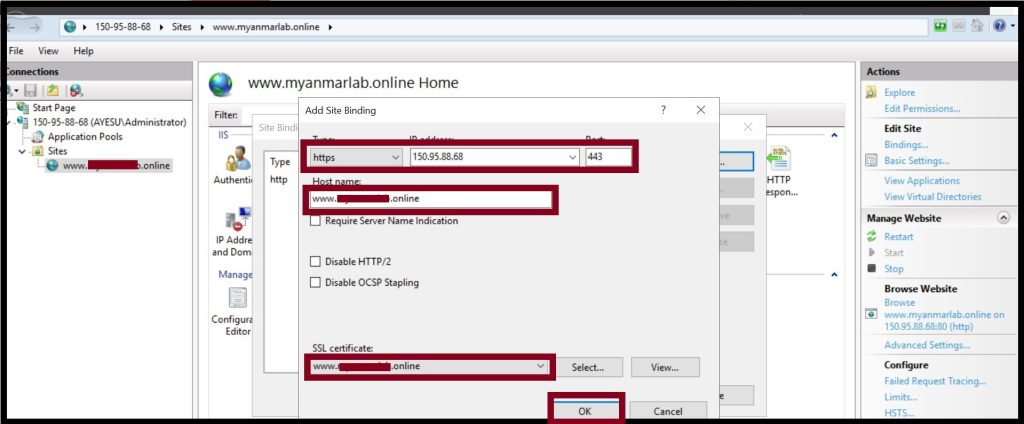
Step9. Select https, select the IP address of your website and type port 443. Type your domain name in the Hostname box, and select a domain name that you want to install SSL and Click OK.
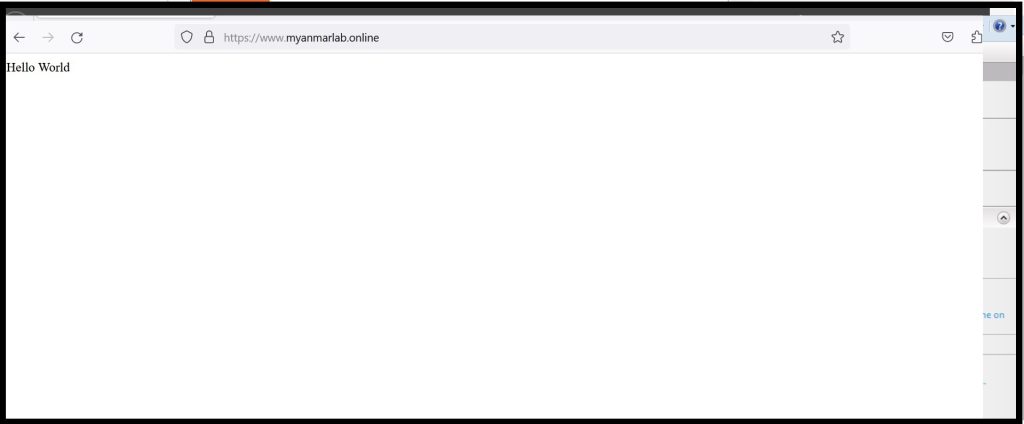
Step10. Your website is now secured with an SSL certificate.
Thank you!!!