
How to Define IP Access to WordPress Dashboard via .htaccess?
Step1. Login to the Z.com account, https://cloud.z.com/mm/signin/
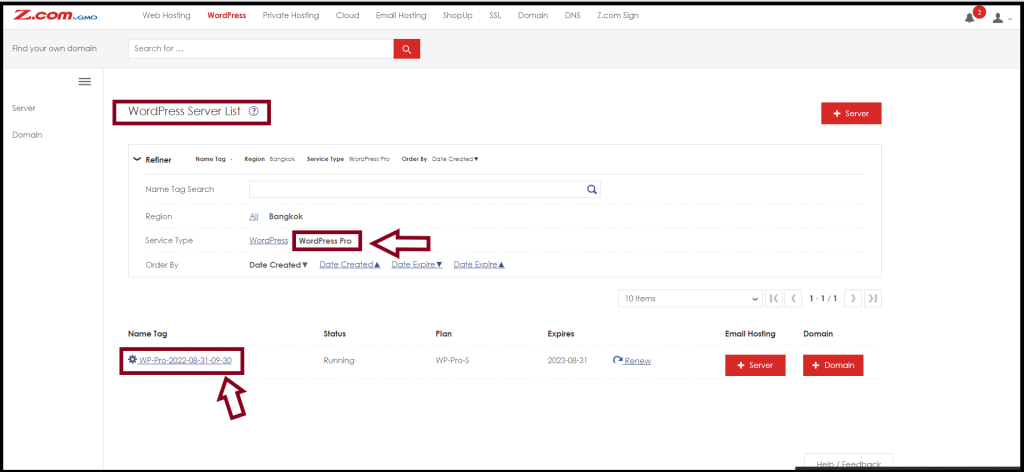
Step2. Click the “WordPress” Menu
Step3. Select your “WordPress Pro Server” Under the Name Tag
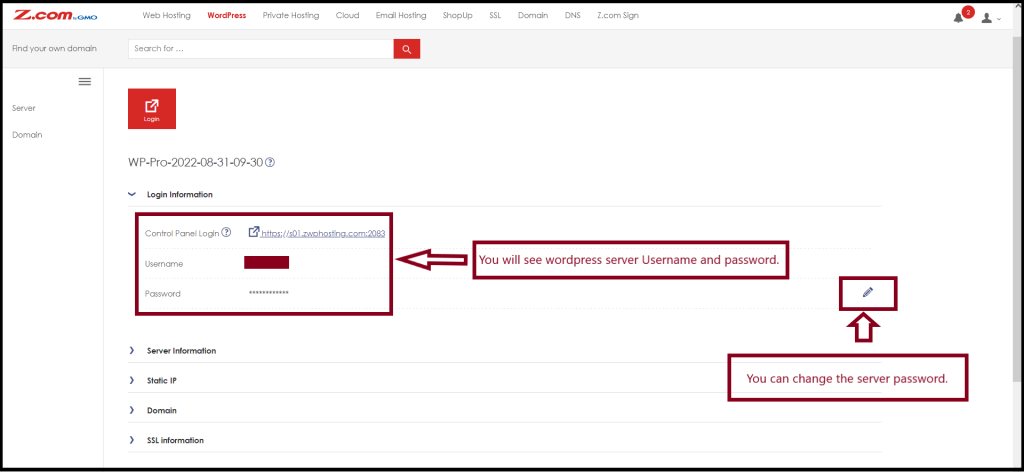
Step4. Click “Login Information” to check the cPanel login
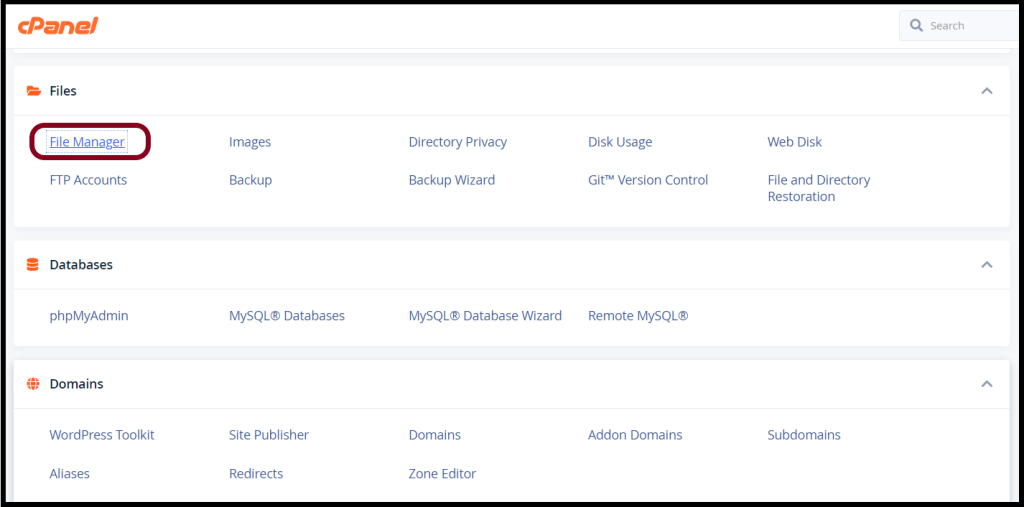
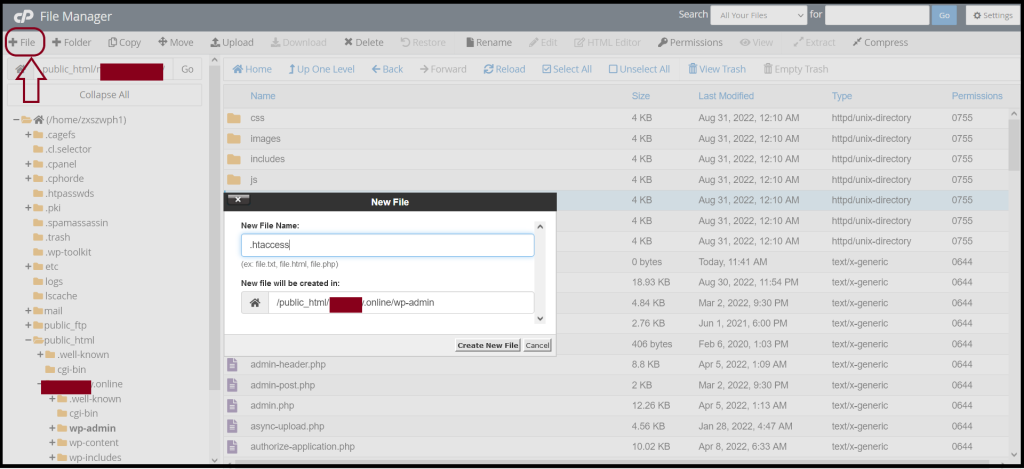
Step5. Go to the “File Manager” Under “Files” on cPanel
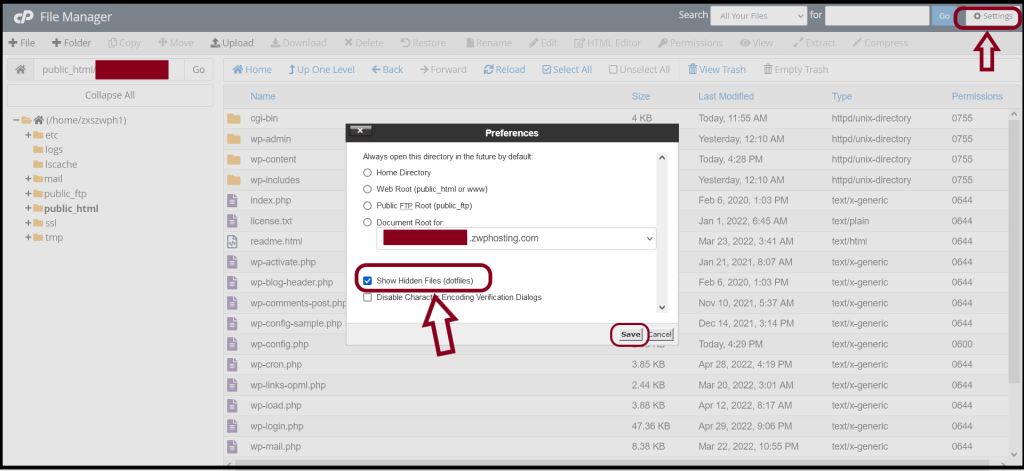
We will configure “.htaccess” to allow and define the IP access. So, please unhide the “dotfiles” on cPanel as follows.
Step6. Click “Settings” and mark “Show Hidden Files (dotfiles)“
Then, go to the following path.
Path: /public_html/yourdomain.com/wp-admin/
You will need to create a “.htaccess” file under the path.
Step7. Click “+File” on File Manager and set the file name to “.htaccess”
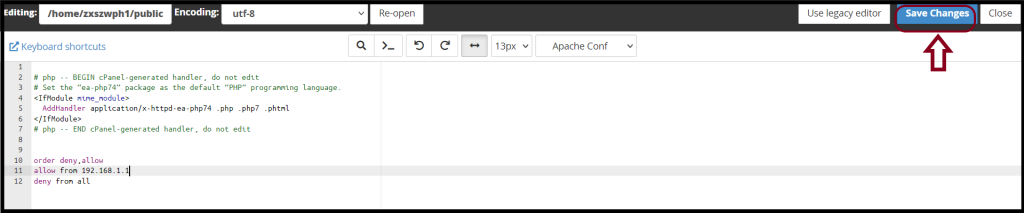
And then, you can edit the “.htaccess” file to configure.

Write the Allow Rule for your Network IP in “.htaccess” and Click “Save Changes“
order deny, allow
allow from xxx.xxx.xxx.xxx
deny from all
Thank you!!!