
How to Install WordPress in Plesk Server?
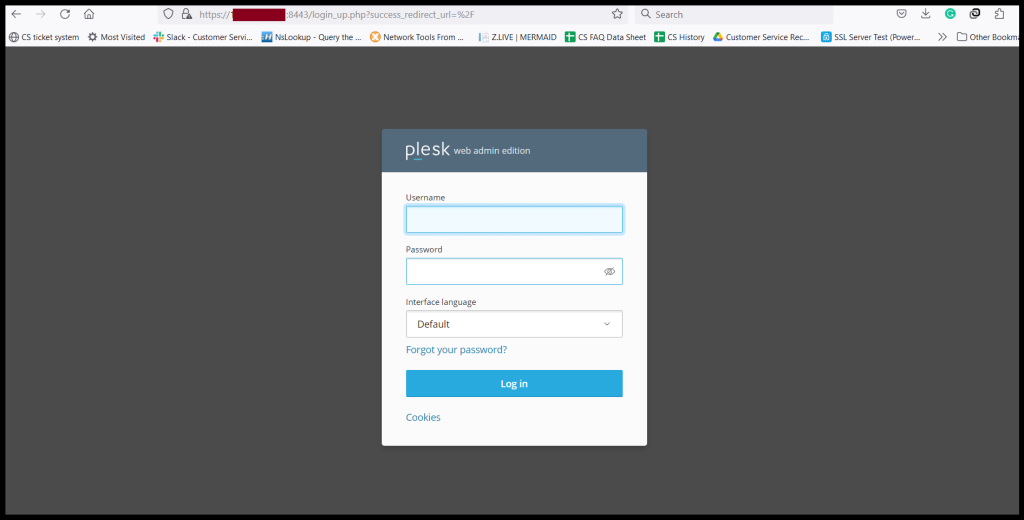
Step1. Login to the Plesk server, https://123.456.78.9:8443/
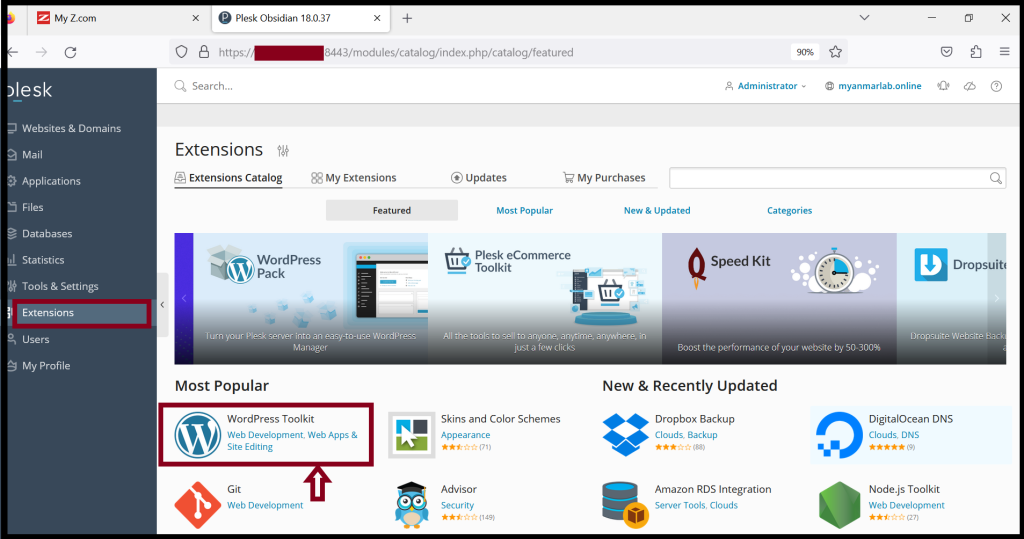
Step2. Go to Extensions and Click “WordPress Toolkit” to install WordPress Toolkit Extension.
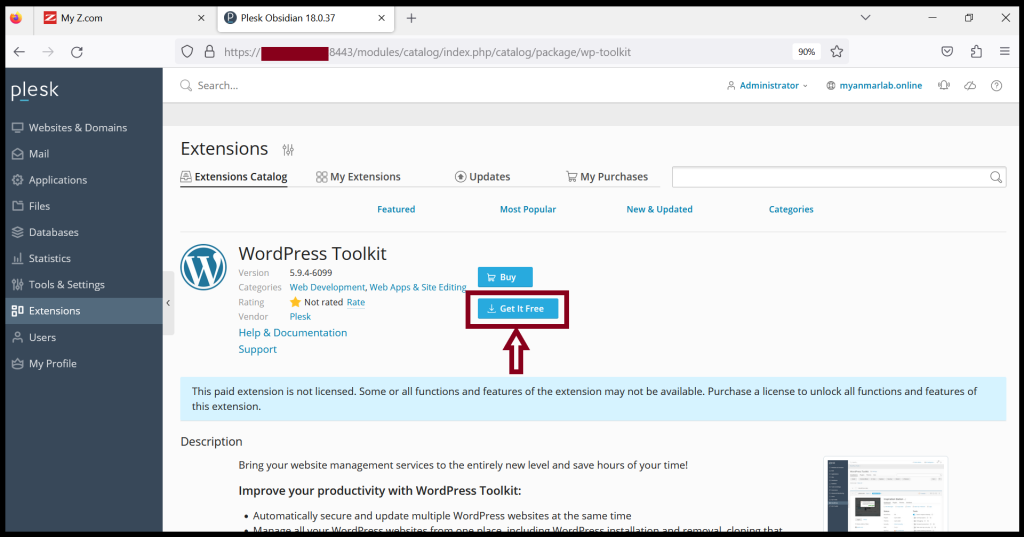
Step3. Click “Get it free” and please wait for the installation process.
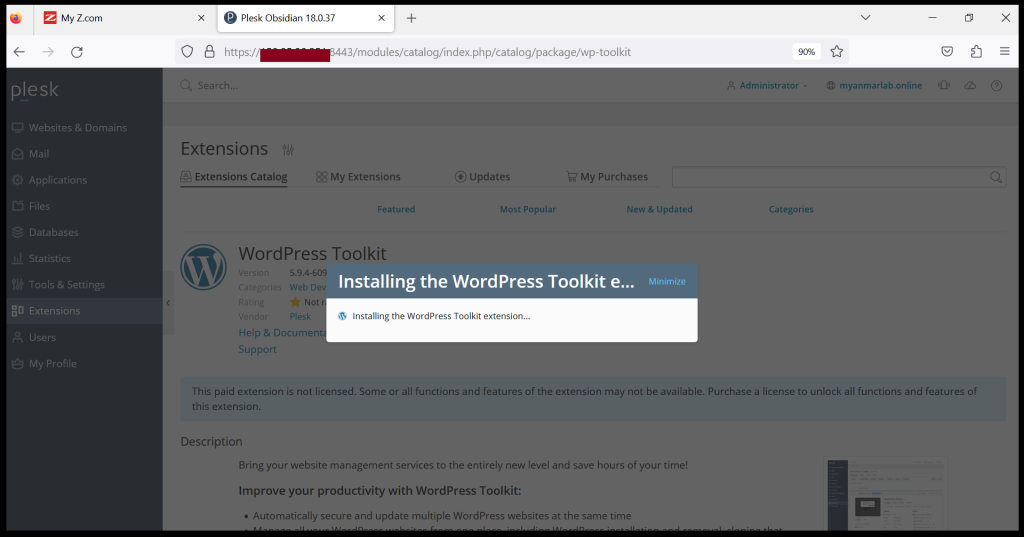
Now, the WordPress Toolkit extension is installing.
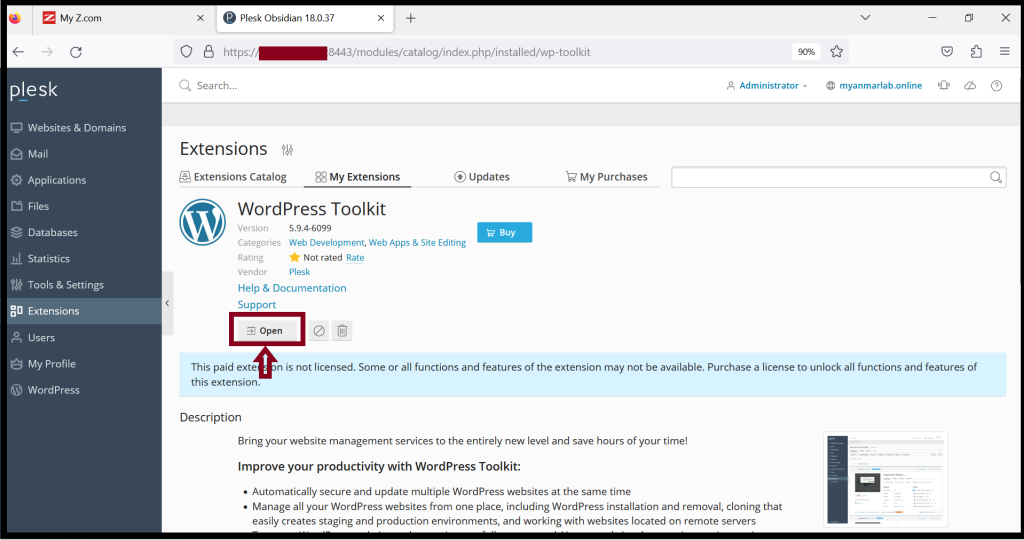
After the WordPress Toolkit is installed, you can open the WordPress Toolkit.
Step4. Click “Open“
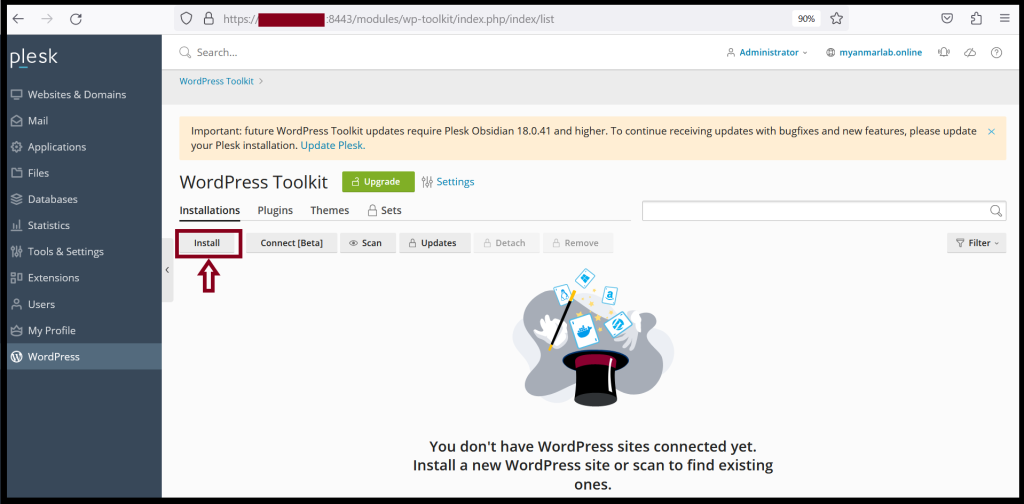
And then, Click “Install” to install the WordPress.
Please enter the General Information of the WordPress Site and the WordPress Administrator
And click “Install“

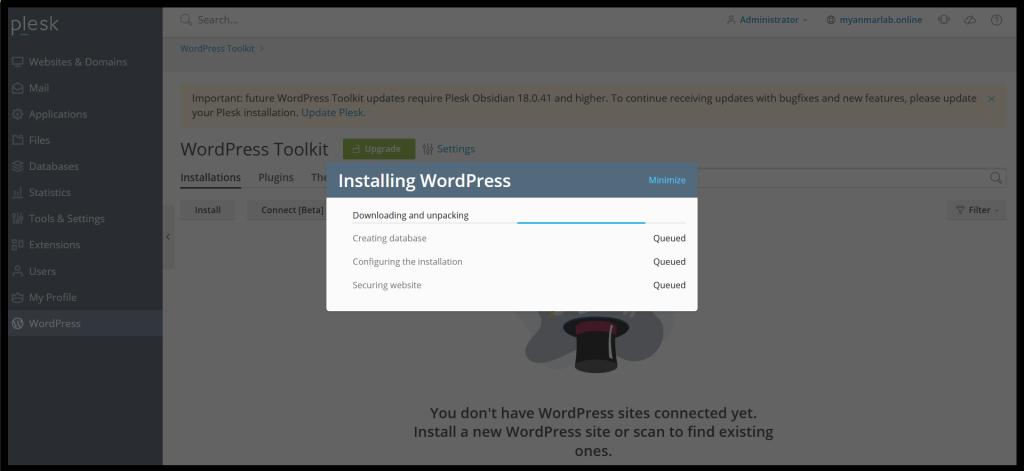
Now, the WordPress is installing and please wait for a moment.
After WordPress is installed, you can also the plugins that you want to install.
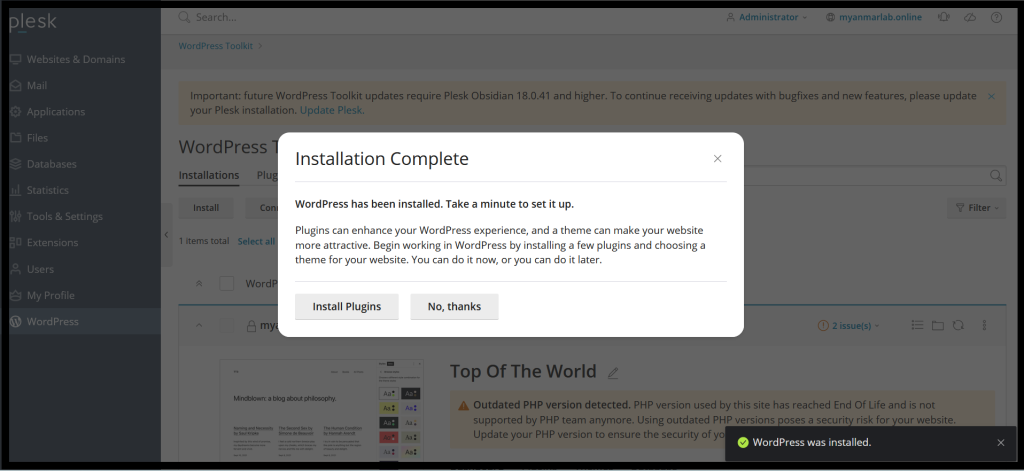
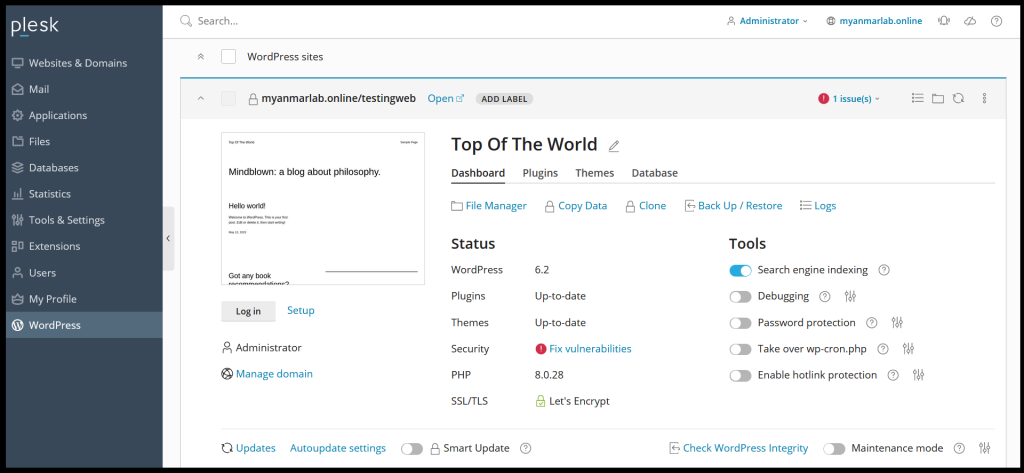
Now, you can install WordPress successfully.
Thank you!!