
How to Setup Email Hosting Server in the Z.com Portal?
Step1. Login to the Z.com account, https://cloud.z.com/mm/signin/
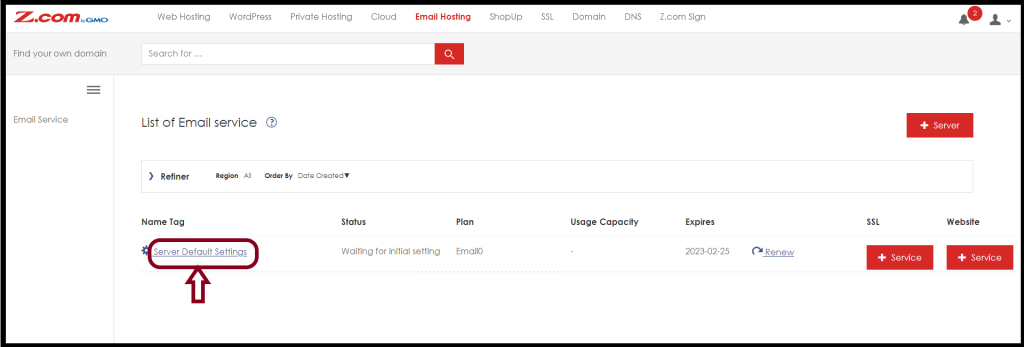
Step2. Click the “Email Hosting” Menu
Step3. Click “Server Default Settings” Under Name Tag
And then, please set up the admin password for the email hosting as follows.
Step4. Enter the “Password” and you can change the “NameTag” of Email hosting also.
Click “Set“

Now, the Email Hosting is Active and Ready to use.
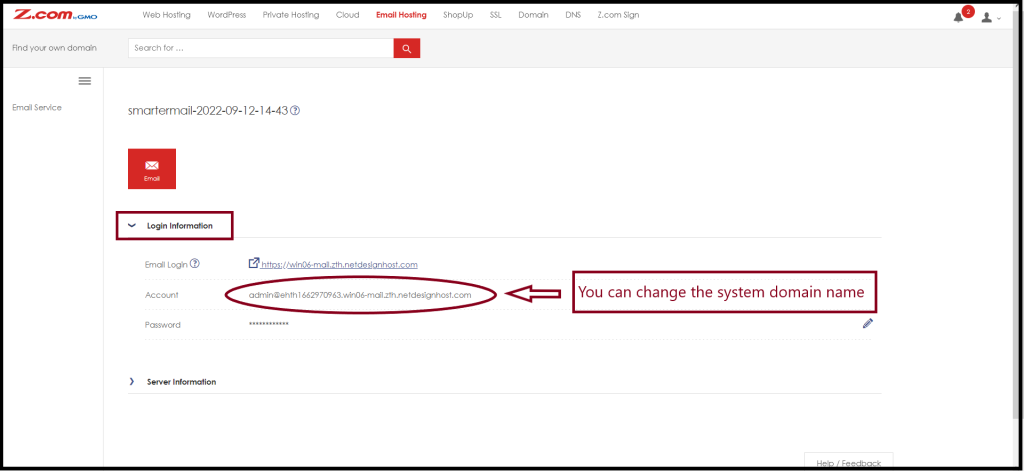
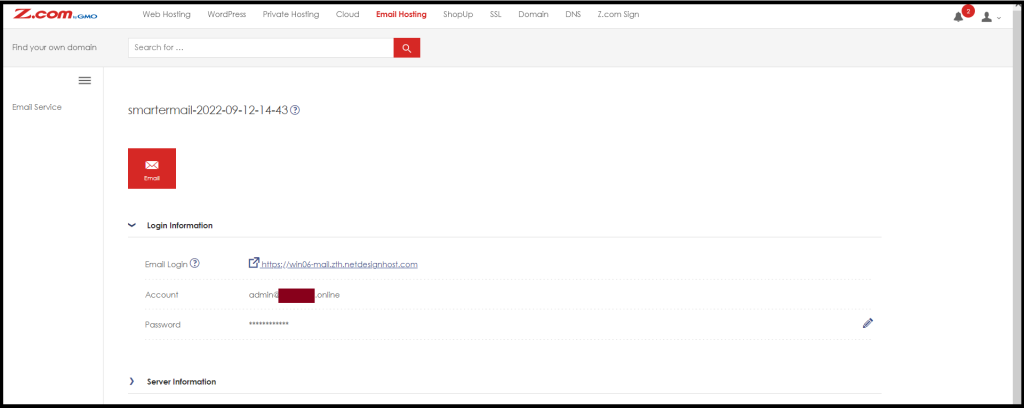
To check your email hosting Login, please enter your smartermail under Name Tag as follows.

Step5. You can check the “Login URL” and Admin address of the email hosting.
If the domain of the admin account is the system’s default domain, you can change your domain manually.
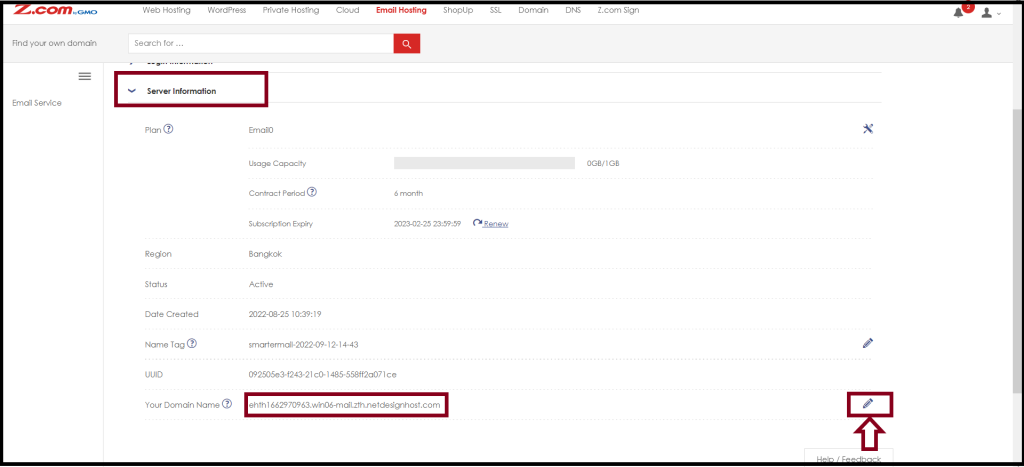
To change the system default domain, Go to the “Server Information“.
Step6. Please select the “Pencil image” to Edit the domain
Then, you can enter the domain that you want to desire and Click “Save“
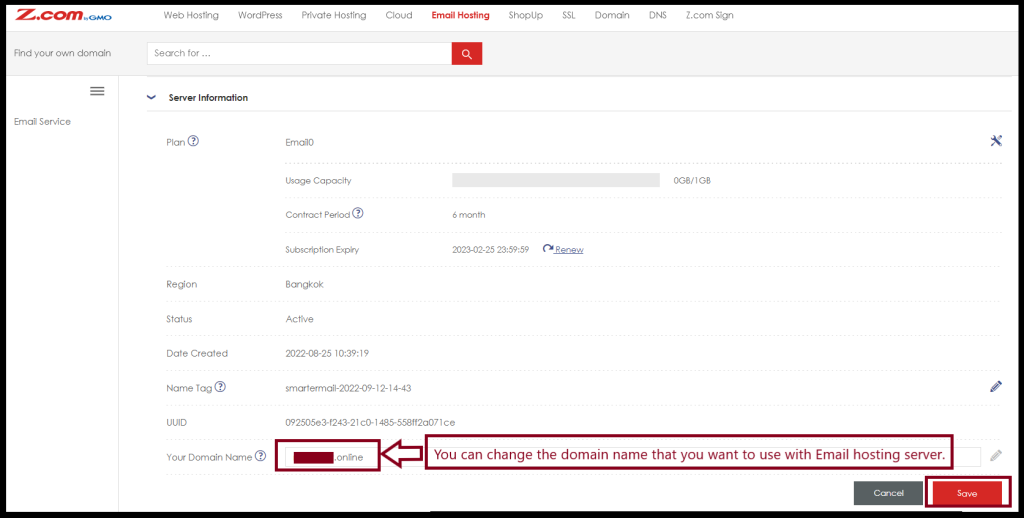
Now, You got the admin account with your own domain.
Thank you!!!