
How to Install Tomcat Version 10 on Ubuntu Server?
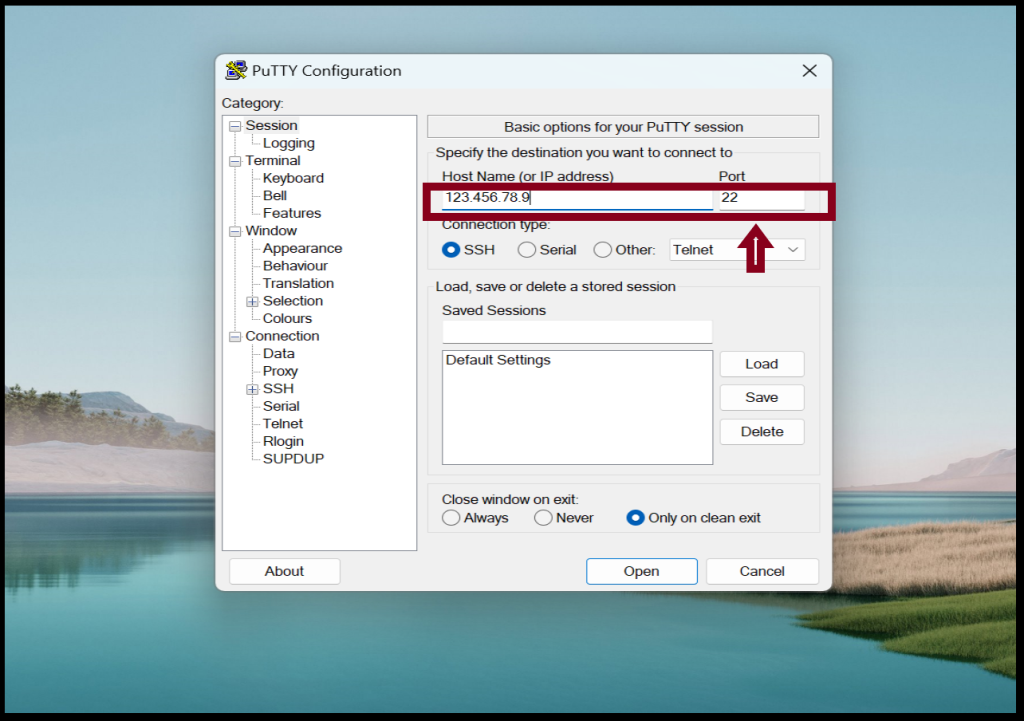
Step1. Login to the server with SSH access.
IP: 12.34.56.78
Username: root
Password: ********
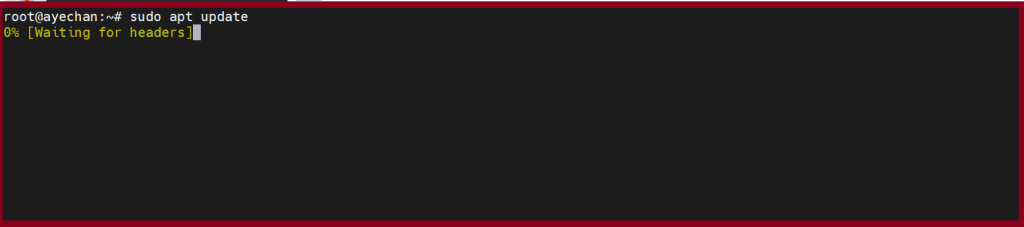
Step2. Before we install Tomcat on Ubuntu, update the system packages file.
root@ayechan:~# sudo apt update

Step3. Tomcat is a Java server; we need to have JDK installed on the system. Please use the following command.
root@ayechan:~# sudo apt install openjdk-11-jdk


If we finished the installation, we can check java version using following command.
root@ayechan:~# java -version

Step4. Create Tomcat User and Group
For security, we should not run tomcat under root user. So, we will create new group and system user to run the Apache tomcat service with home directory /opt/tomcat.
root@ayechan:~# sudo groupadd tomcat
root@ayechan:~# sudo useradd -s /bin/false -g tomcat -d /opt/tomcat tomcat

Step5. Download and Extract Tomcat 10
You can download it directly from the Tomcat download page. Just copy the link of the core tar.gz file under the Binary Distributions section. https://tomcat.apache.org/download-10.cgi

Go back to the terminal and change to the /tmp directory with the command.
root@ayechan:~# cd /tmp
To download from the copied link (from Tomcat website), use the following curl command:
root@ayechan:~# curl -O https://dlcdn.apache.org/tomcat/tomcat-10/v10.1.17/bin/apache-tomcat-10.1.17.tar.gz

To extract the tar.gz Tomcat file, create a new /opt/tomcat/ directory with the command. After that extract the file in the new directory with the following command.
root@ayechan:~# sudo mkdir /opt/tomcat
root@ayechan:~# sudo tar xzvf apache-tomcat-10.1.17.tar.gz -C /opt/tomcat --strip-components=1

Step6. Now, change the ownership of the /opt/tomcat/bin directory to tomcat and set the execution permission to all files and directories.
root@ayechan:~# cd /opt/tomcat
root@ayechan:~# sudo chown -R tomcat: /opt/tomcat
root@ayechan:~# sudo sh -c 'chmod +x /opt/tomcat/bin/*.sh'


Step7. Create System Unit File
Before we use Tomcat service, we need to create a systemd service file. To configure the file, we first need to find the JAVA_HOME path. Using the following command.
root@ayechan:~# sudo update-java-alternatives -l

Open your text editor and create a file name tomcat.service in the /etc/systemd/system.
root@ayechan:~# sudo nano /etc/systemd/system/tomcat.service

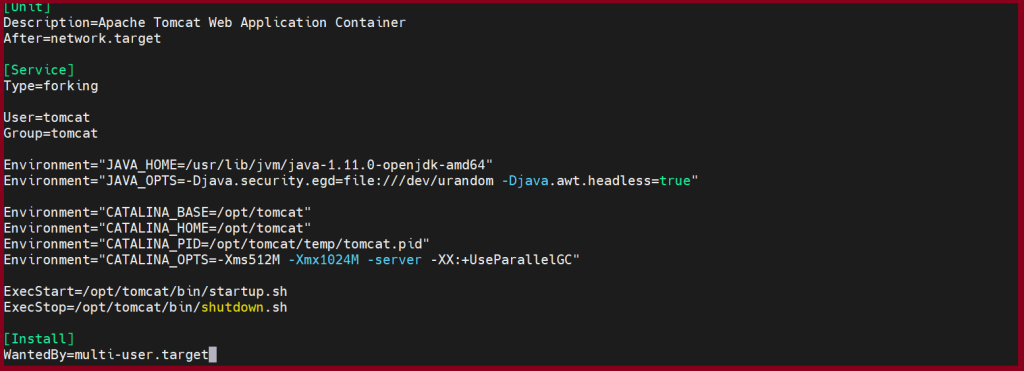
Next, paste the following configuration:
[Unit]
Description=Apache Tomcat Web Application Container
After=network.target
[Service]
Type=forking
User=tomcat
Group=tomcat
Environment=”JAVA_HOME /usr/lib/jvm/java-1.11.0-openjdk-amd64”
Environment=”CATALINA_PID=/opt/tomcat/temp/tomcat.pid”
Environment=”CATALINA_Home=/opt/tomcat”
Environment=”CATALINA_BASE=/opt/tomcat”
Environment=”CATALINA_OPTS=-Xms512M -Xmx1024M -server -XX:+UseParallelGC”
Environment=”JAVA_OPTS.awt.headless=true -Djava.security.egd=file:/dev/v/urandom’
ExecStart=/opt/tomcat/bin/startup.sh
ExecStop=/opt/tomcat/bin/shutdown.sh
[Install]
WantedBy=multi-user.target
For the changes to take place, reload the system daemon with the command.
root@ayechan:~# sudo systemctl daemon-reload
The following commands will allow you to execute the Tomcat service:
root@ayechan:~# cd /opt/tomcat/bin
root@ayechan:~# sudo ./startup.sh run

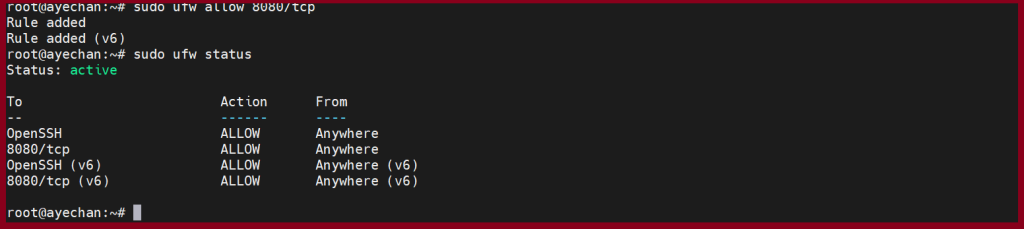
Step8. Adjust the Firewall Setting
Tomcat uses Port 8080, which is outside your local network.
root@ayechan:~# sudo ufw allow 8080/tcp
root@ayechan:~# sudo ufw status
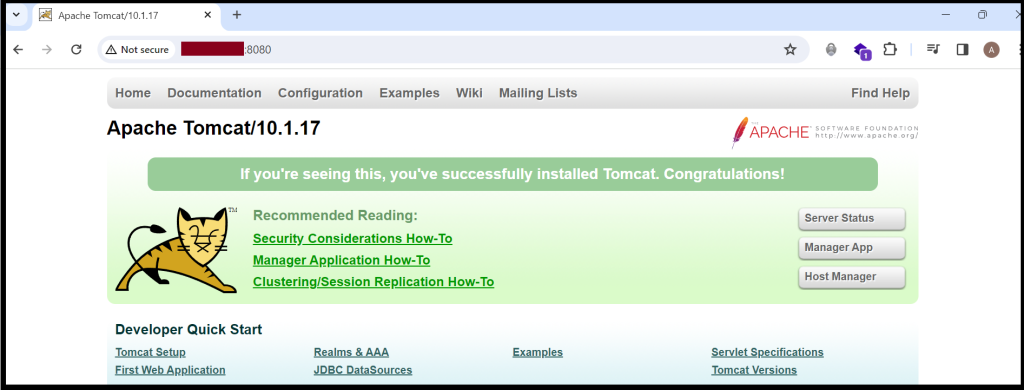
If the port is open, we can check Tomcat webpage from the browser
http://server_ip:8080
Step9. Configure Web Management Interface
For security reasons, it is recommended to create an admin user and password to access the Tomcat application. You can create it by editing tomcat-users.xml file.
root@ayechan:~# sudo nano /opt/tomcat/conf/tomcat-users.xml

<role rolename="manager-gui"/>
<user username="tomcatadmin" password="password" roles="manager-gui,admin-gui"/>

Step10. Enable Tomcat Remote Access
The default Tomcat manager and host-manager applications are accessible for localhost only. To allow access to these pages from the remote system, you need to modify the following configuration files.
root@ayechan:~# sudo nano /opt/tomcat/webapps/manager/META-INF/context.xml

Close the following lines: Repeat the same process for the host-manager file
<!--
<Valve className="org.apache.catalina.valves.RemoteAddrValve"
allow="127\.\d+\.\d+\.\d+|::1|0000:1|THE.IP.ADDRESS." />
-->

Similarly edit context.xml for the host manager application in the text editor:
root@ayechan:~# sudo nano /opt/tomcat/webapps/host-manager/META-INF/context.xml


root@ayechan:~# sudo systemctl restart tomcat
Thank you!!!